The works and ongoing projects of Jonathan Ferran

jonferran@yahoo.com

Tuesday, January 26, 2010

Audio reactive multitouch visuals from jonathan ferran on Vimeo.


Multitouch visual program made in processing. It reacts to 6 bands of audio and of course multitouch.


Song is: Synaecide - Close Bracket

Saturday, January 16, 2010

I'm teaching myself a bit of programming to be able to write apps for this screen. I got the hang of making objects and now I am excited to continue learning.

I wrote a little paint app in processing. The color bars on the left can be dragged to set the red green or blue values of the brush. The box in the upper right erases the screen and also shows what color is currently selected.


Check here for app download and source code.


This one really shows off the kind of color variation you can get.

Tuesday, January 12, 2010

Hello World with processing and TUIO

Here is my first success at making a program that interfaces processing and TUIO.

Written with the touch surface


Yay Processing!

Monday, January 11, 2010

I'm just doing boring stuff with the screen, and work has picked up so that takes most of my time. So in the mean time, here is some work that other people have done.

http://www.msavisuals.com/ has some fascinating work with interactive visual art.

Here's an example of some audio reactive realtime 3D rendering made with Quartz Composer.


Amoeba Dance from Memo Akten on Vimeo.

Here's an interactive projection piece that transforms movement into images of splashing paint.

"Body Paint" Installation at "Clicks or Mortar", March 2009 from Memo Akten on Vimeo.

Just a quick update.

The screen is pretty much complete. I have to cut a new piece of drafting film because this one is slightly out of shape.

One of the lasers is acting up so I have 2 more on order. The new ones will have the 90degree lenses on them to make for a stronger beam.

I'm working on learning processing now, but it seems the 1.3 version of CCV doesn't want to send proper TUIO messages, which sucks because it has a lot better image processing capabilities. I get better blobs with 1.3, especially with this bunk laser.


Here's my inspiration for visual effects.

Superfluid vs Particle from jimi hertz on Vimeo.

Saturday, January 9, 2010

Laser Power Module


I like working with lasers because they are just cool. It was a hassle to align the lasers, but I have the best excuse for why I stayed in the house on a friday night... "Oh, I had to align the lasers." "Had to troubleshoot the laser power module." Bad ass.

Anyway, stuff got wired up today. Soon I will post what my procedure was to align them. It took a while to figure out the right way to do it, but once I got it down, it's easy. The piece of acrylic is a bit bulged out in the middle so this made things a bit challenging. I need to get one of those nifty Peau Productions lenses for this camera because it can barely view the whole screen from where its mounted.

Here's some pics.


The voltage regulator circuit. Outputs a constant 3.2 volts for the lasers, no matter what voltage is input. Only 4 components to this circuit, the voltage regulator (black square with metal tab) 2 resistors and a capacitor.


USB Powered lasers.


Ready for wiring.


Laser Laser Laser Laser. 2 with 120degree line lenses, 2 with 90 degree line lenses.


This pic is cool because in real life the glow from the laser is a deep red.


That's what the beam looks like.


What the camera sees. Yay.


This one's for Reda.


Final setup starts tomorrow.... now to write some software.... hmmm.... www.processing.org

Friday, January 8, 2010

Camera mount

The camera mount is attached to the top of the mirror with goop (shoe
goo, E6000, etc).

Wednesday, January 6, 2010

Let there be light.

I finalized the design for the frame today. It is now a solid piece of 1" square stock around the whole base. This makes the whole thing pretty sturdy and square.

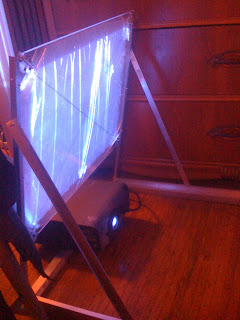
Projector mock up. The throw distance and the mirror size are spot on for this lens.


It also folds up nicely. It should be very easy to transport.


After a much needed trip to the hardware store for some more aluminum stock and fasteners, I had what I needed to finish the frame.


The frame base uses 1" square aluminum stock around the whole bottom of it. This keeps things nice and square and solid.

Aligning and squaring the corners in preparation for drilling holes.


close up of corner construction.


I redid the mirror mount. It is now a lot more solid. It doesn't shake around as much as before.


Final mirror mount.


Projector eye view.


Today's result. Note in the 3rd pic the projector is slid forward. This is about as far forward as it can go, not bad for such a long projector.

Got alot done

I pretty much finished the whole frame. I was going to use a piece of wood to tie it all together, but I decided to use this piece of square aluminum I bought from the hardware store. I will fill it out later with a platform if I need to. The back where the mirror is hanging off is still in need of a piece of square aluminum to tie it together and make it more sturdy. Hardware store closed at 1am. Will have to wait till tomorrow.

Here's the progress so far.


Here are some construction pics.

I am fascinated by this square aluminum stock, it is very straight and sturdy. makes good straight things.

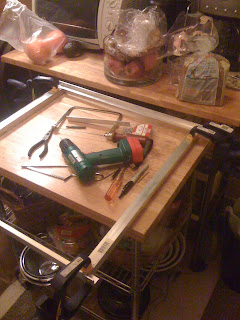
I clamped it all down and drilled some holes so it all lined up square.


Then it was screwed together with drill point metal screws.


The aluminum stock cut, waiting for drill batteries (note green drill handle sans orange battery on left of pic).


Frame and screen mock up.


The frame parts, drilled and ready to go.


Mirror test - pass.


Mirror mock up.